Whether you’re new to Adobe Illustrator or have been working with the software for years, it can be tricky to remember everything it’s capable of. Every year they roll out a handful of updates, so some of them get lost in the shuffle. So without further ado, here are a few handy tips and tricks you may not know exist.
Learning all of @Adobe’s tools and shortcuts can feel daunting! RBM’s Graphic Designer, @January_RBM has you covered! Check out her tricks that’ll save you and your team time! Click To TweetNew Illustrator Feature: Intertwine
Intertwine is Adobe’s latest Illustrator feature that allows you to quickly overlap shapes, text, and 3D & 2D objects while maintaining editability and without outlining them. Here’s how simple it is to use:
Once you’ve arranged most of your typography or shapes how you want them, select the two objects you’d like to interact (they do not need to be expanded or converted to outlines). Next, navigate to the Intertwine option inside of the Object drop-down menu. Select Make from the options given.
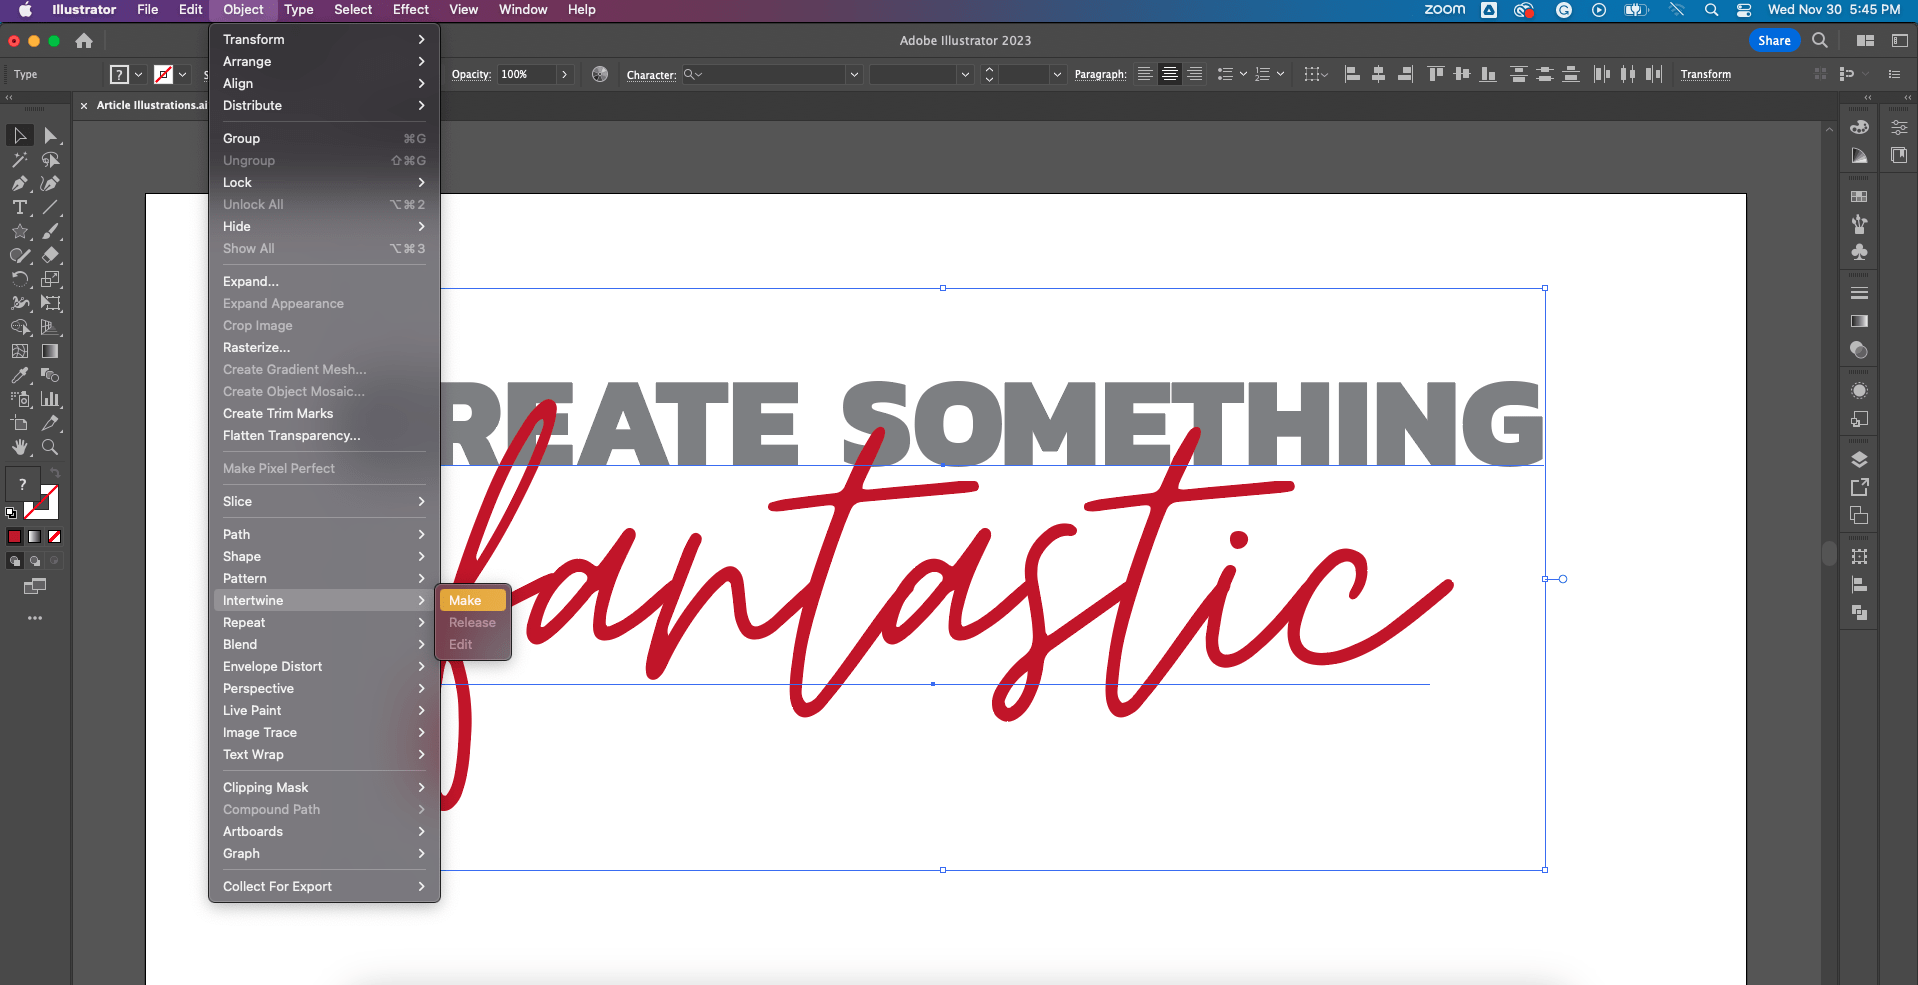 Using the lasso tool that appears, simply circle the areas that you would like to fall behind the other object. Voila.
Time-Saving Illustrator Feature #1: Radial, Grid, & Mirror Repeat
If you’re anything like me, you’ve primarily used the pattern tool to create a repeating series of shapes. There, however, are two more straightforward ways to go about this that allow for a little more control and less guesswork.
Radial Repeat
Radial repeat is best for replicating objects around a circle. Start by selecting the shapes you’d like to repeat and navigate to the Repeat option inside of the Object drop-down menu, then select Radial.
The Illustrator default shows eight instances initially, but this can easily be changed in the top menu bar or by moving the instance bubble to the right of the objects up or down.

To change the size and spacing between your objects, move the controls (full white bubbles) on the circle. You can also move the splitter (halved white bubbles) on the circle to remove some of your copies.

Grid Repeat
Grid repeat is best for replicating objects in lines. Start by selecting the shapes you’d like to repeat and navigate to the Repeat option inside of the Object drop-down menu, then select Grid.
Once again, Illustrator defaults to 8 instances, but this can be changed by moving the handle on the bottom to add more rows or the handle on the right to add more columns.
Bonus tip: Increase or decrease the spacing between columns by moving the sliders to the left or above your object.
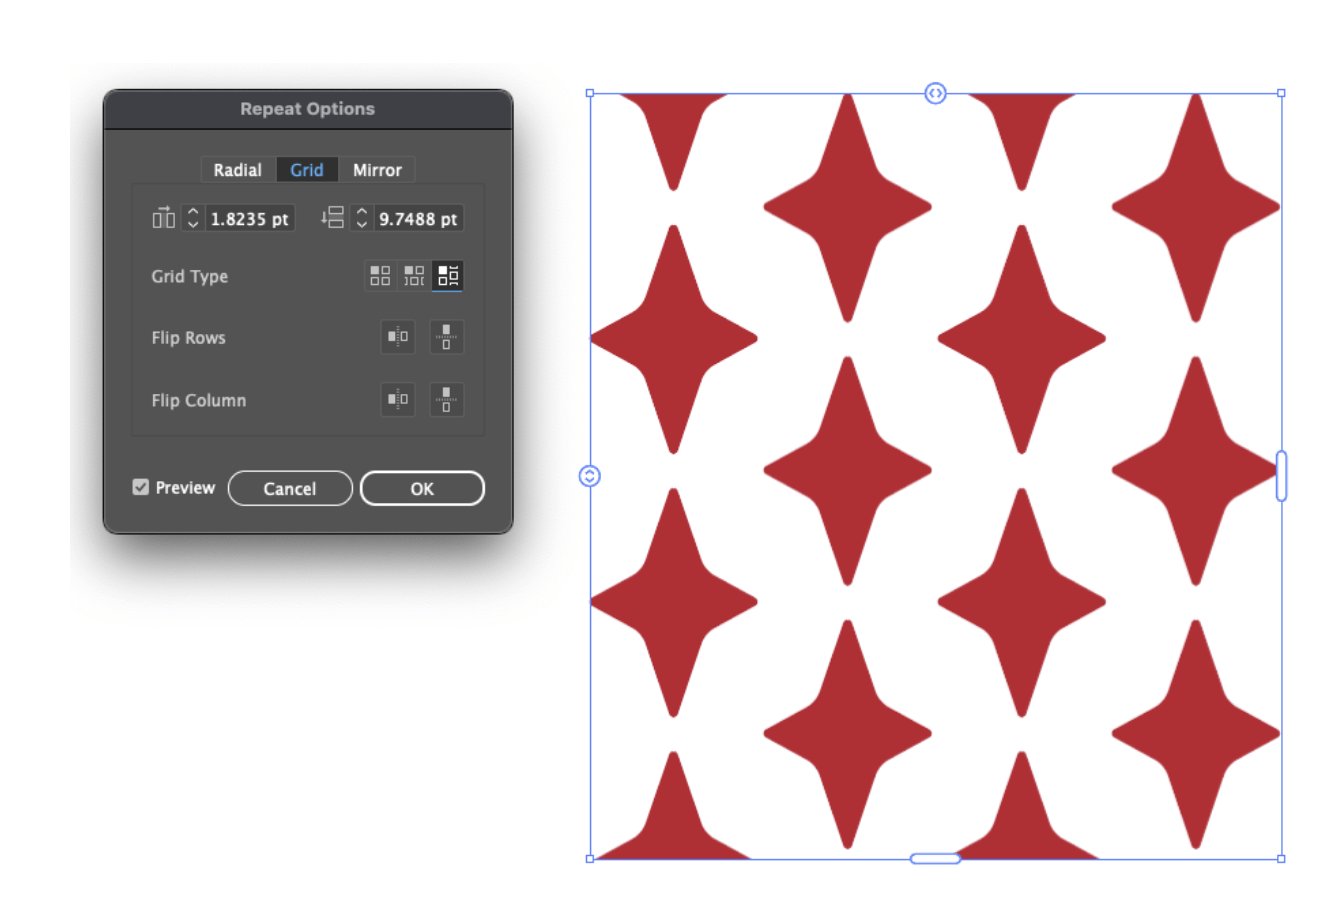 You can also change the grid type inside the Repeat option panel to create a more staggered pattern.
Mirror Repeat
Mirror repeat duplicates your object while still allowing you to edit both instances. Start by selecting the shapes you’d like to repeat and navigate to the Repeat option inside of the Object drop-down menu, then select Mirror.

To rotate or transform the mirrored object move the bubbles on the top and bottom of the dashed line (symmetry axis); to change the angle and spacing, move the dashed line to the left or right.
Time-Saving Illustrator Feature #2: Quickly Creating Artboards
If you have objects, illustrations, or images that are outside of your current artboard that you would like to be on their own artboards, this trick is for you. Simply select your grouped object, click on the artboard icon in the left toolbar, and click your selected object: a perfectly sized artboard with appear!

Time-Saving Illustrator Feature #3: Touch Type Tool
This last tip is the one that I personally use the most. The Touch Type tool allows you to edit and manipulate live text, meaning there is no need to outline your text in order to manipulate individual characters. This is great because it allows you to continue editing later on.
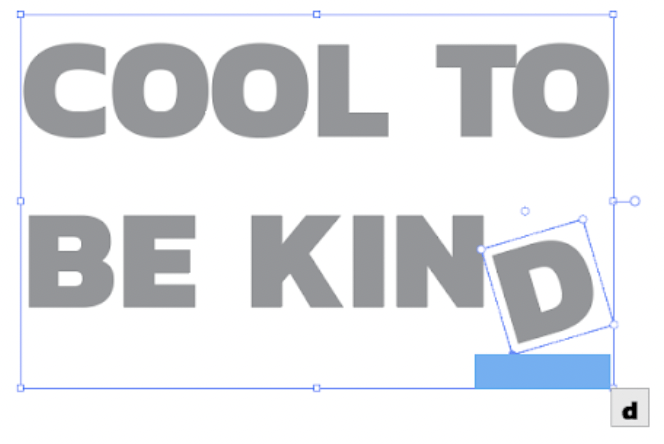
Start by selecting your text, then open the type tools in the left toolbar by holding down on the Type Tool icon and select Touch Type. Select the character you’d like to manipulate using the new cursor, and then move, scale, and rotate as you see fit!
While learning all of Adobe’s tools and shortcuts can feel daunting, these and other tricks can save time, allow you to streamline your workflow, and allow your team to create content even faster. These few tips also barely scratch the surface of everything the software is capable of, so keep exploring and learning!
Looking for more tricks of the trade? Subscribe to the Red Branch Media blog!
Related Posts

 6 Minute Read
The First Date Principle: Why Bidirectional Communication is the Heart of Meaningful Sales and Marketing
6 Minute ReadStop Hitting on Women Through LinkedIn, You Damn Fools
8 Minute Read