Welcome back to our blog series on Employee Photos in Vista. In the last article, we discussed how employees and manager with full access to the Photographs security option can freely add photos to their own record or the records of their staff. If, instead, your organization prefers to have a level of oversight before photos are live in Vista, you can use the photo approval process. This allows one or more designated reviewers to screen the photos that employees and/or managers upload before they are displayed for all to see.
In a previous article, we discussed which security settings need to be adjusted in order to enable the photo approval process. As before, users can access the Photo Viewer dialog box by clicking the existing photo on their record or the placeholder silhouette image. With photo approvals enabled, users can only upload a photo via the Pending link.

Once a photo is uploaded, it will be assigned as the employee’s pending photo and sent to the Photo Approval screen. Any users that are designated as “photo approvers” (by enabling specific security options for them) can access the Photo Approval screen from the System Administration Setup, under Application. All pending photos will be displayed here.
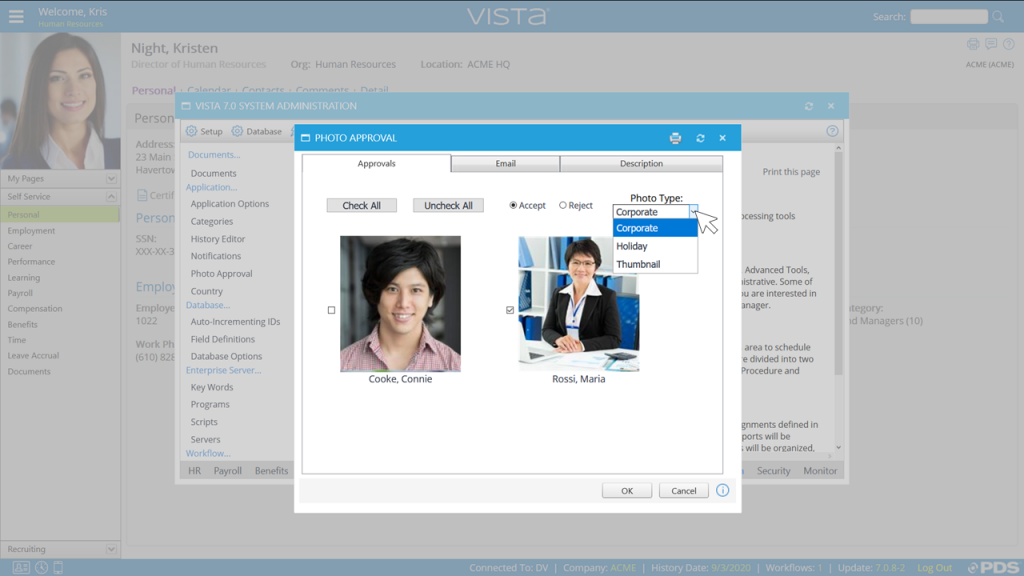
Using the checkboxes, the approver selects one or more of these photos and will either Accept or Reject them by selecting the appropriate radio-button. If the photos are being accepted, the approver will use the Photo Type drop-down menu to determine which Photo Type these photos will be assigned to. This is not necessary if the photos are being rejected.
From the Email tab, approvers have the option to send an email to the users that uploaded the photos that are being approved or rejected. They can check “I want to send an email with this report,” then input a subject line and body for the email.
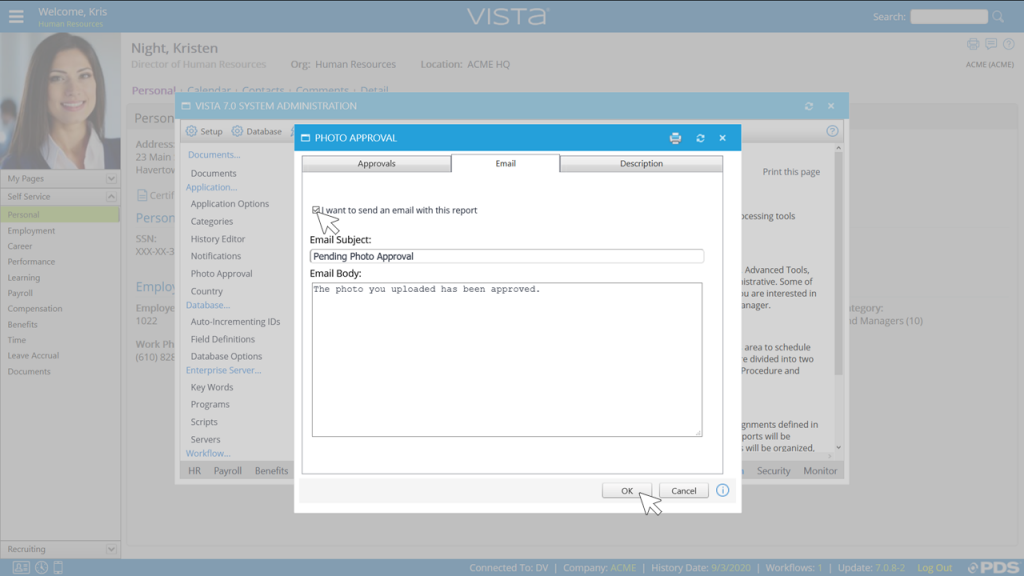
Once the approver clicks OK, the photos are either accepted or rejected and the email is sent. Rejected photos are removed from the Pending photo link in the Photo Viewer and accepted photos are assigned to the Photo Type that the approver designated.
To see this process in action, check out our VistaFlix video Employee Photo Basics.
Please be sure to read the next entry in this series, where we discuss photo processing jobs that are available in Vista and how to use them.
Roger West
HCM Sales Specialist | PDS
rwest@pdssoftware.com